Thursday, December 19, 2013

Merry Christmas and a Happy New Year

The picture says it all, painted by the infamous Tom Newsom.
Thanks for all your visits, comments, and I wish you Merry Christmas, and a Happy New Year!


http://newsomart.com/gallery.php?gallery=6

Monday, December 9, 2013

Two GP15-1 in action

this weekend I managed to install a Loksound select direct DCC decoder in my second GP 15-1 locomotive.
I also gave it the same LED upgrade as the first one, so both of them now operate with nice bright headlights, smooth running thanks to the excellent motor control of these ESU decoders, and decent sounds.
If anything, the sound of the horn is the only minor criticism I have about the sound project inside these decoders. I know that ESU is working on upgrading the recordings though, so as soon as they become available, I'll upload a new sound project in both locos, which then also will include the correct nose gong sound instead of the current bell.


Friday, November 29, 2013

New Logo for the NMRA British Region

Last year or so, I reported that the NMRA (National Model Railroad Association) had redesigned their logo.
The British Region (a region of the NMRA based in the UK, and one of the oldest regions outside the USA), decided it would be good to update theirs too, to show the family link with the parent organisation, and to give it a fresh new look.
It has now officially been accepted and it is pictured below.  I am reposting it to give it exposure, and introduce it to a wider audience.

Oh and shameless plug etc, Membership of the NMRA-BR doesn't have to be expensive. You can be a member starting as low as GBP 14,- per year.  Go here for more details: http://www.nmrabr.org.uk/interested-in-joining


Thursday, November 28, 2013

30000 visitors

This blog has now been visited 30000 times.
Thanks to everyone visiting my blog!
I hope you find some useful info here, and/or enjoy reading about my own modeling activities etc. For those of you who have only just found it, have a look at the useful links section to see if there's anything of interest there, or go through the blog archive.
There might just be something there that covers what you might be looking for.


CFNR 108 has arrived

A nice surprise was delivered at my door today, my second GP15-1 has arrived. Christmas has come early!
This one will get the same treatment eventually as the first one, ESU loksound decoder, and LED's in all light positions.
(and this time I'm not going to blow up the stock bulbs first :-) ).


This is my last locomotive for now that I'll be buying new and have had on pre-order for some time. The next couple will be ones I already own and am scheduling to detail, paint, weather and convert to DCC+sound, first of which is the GP9 commuter locomotive.  
The only pre-order I have outstanding is a few more box cars, SP and SP patched 'golden west service' cars, which were very common in the area I model, they are not due until next year sometime though.


Tuesday, November 26, 2013

winter month modeling projects

Now that it's getting darker early, and temperatures dropping,  indoor activities are getting more attractive again of course, and in my case, model railroad projects are getting a boost.
I've got several that I'm hoping to complete in the coming months, these are:
- Replacing of some turnouts on my home layout from a mixture of old Shinohara and peco code 75, to Peco code 83 US style turnouts, including Conrad turnout motors). I've got 4 on the entrance of the Napa Jct yard that I want to change out for these, and of course wire them all up.
- Model and finish at least one GP9 (out of two shells I have) , turning it into a detailed commuter geep SP 3191.
- Add LED's and a sound decoder to my second CFNR GP15-1 (yes you read that correctly, the second one is on it's way as you read this :-) ).
- Getting my new module Tree Point to an operable condition, so I can 'play trains' .

There might be other things but these are my main projects, and that looks like a tall order already , we shall see how it goes.


Monday, November 11, 2013

Micro LED's

I have recently installed some LED's in my new GP15-1, for which I'm also making a video. I hope to complete that video by next weekend, and  will post it next week.

Just prior to doing this install, I ordered some micro LED's to see if I could make up a couple of ready wired LED's for my own use. I'm thinking of using these in headlights of model cars etc.

However what I haven't found is a thin enough insulated wire that I can use to solder these to, not to mention a solder tip for my solder station that is thin enough to handle this..
Have a look at this picture, those two yellow dots on my finger are two LED's. VERY TINY indeed.

I am going to struggle making these up, and I'm going to take my time in figuring out how to do it without burning them.  In the meantime, if you don't want to give yourself a headache, have a look at the mini and micro LEDs at Express models, from the UK. While 4 of them will cost you about 5 GBP, they do come with additional resistors, and what's more, you won't need to solder them :-)


Monday, November 4, 2013

ESU LOKSOUND SELECT DIRECT Installation

Here's a video I put up on my latest installation, I'm hopefull you'll find it useful.


Thursday, October 31, 2013

ESU Lokprogrammer

Today I received an ESU Lokprogrammer, which I had ordered.  I now own a total of 2 locomotives that use an ESU Loksound decoder. While these were shipped to me with sounds pre-loaded, they can be updated with new or more custom sounds. This is what you need the Lokprogrammer for.
I've already made use of it to change the sounds in the decoder that I installed in my CP Rail GP38-2 locomotive. The new sound file is clearer and sounds a lot more like a non turbo 645 engine than the old file.

ESU also has some of the finest motor control in the business. Low speed performance is flawless, and that's important for use on switching layout, smooth acceleration from stand still etc. Nothing spoils the 'illusion' than a loco that 'yerks and stutters'.
Obviously, it also helps to have clean wheels, and a good mechanism. You can't make a bad loco perform fantastic, but the ESU electronics can certainly make it a bit better than others that I've tried so far.
If you're not into sound, but would like to upgrade your decoders, try their Lokpilot series decoders.


Tuesday, October 29, 2013

Enhancing the realism of track

In another post a little while ago, I showed you how you could make Peco (and probably other manufacturers too) turnouts more reliable.
This time, I'll share with you a simple technique that will help in making your factory made track look more realistic.
It takes a little time and patience, but it isn't difficult. 
If you turn a piece of track upside down, you'll see small pieces of plastic that hold the ties together.
These are there to make the track a bit more strong, but they also make it look more solid and unrealistic, there is no such support on real track. If you have a large layout then the following might take a lot of time, but if your layout is smaller, or if you have no problems in spending more time, then the following is a good thing to do.
Take a sharp knife (be careful obviously), and cut away these small interconnecting pieces of plastic.

The ties now are all loosely connected to the rail.  Do this on a stable underground, as you don't want to break the plastic 'spikes' that hold the ties to the rail.


If you then look at it from the top you'll notice that this gives the track a more realistic appearance, there is 'air' below the rail and between two ties.


Left: track after cutting , Right: Original track
The picture to the left  illustrates the effect well.


Now depending on what kind of track you model, on a piece of flex track you could remove a few ties, and be able to slide the ties a bit more uneven, with some larger gaps in between some of them, giving the impression of older, less maintained secondary trackage.

Obviously that's not something you'd see on a well maintained mainline, but an industrial area, or rail yard could see this quite easily.


Sunday, October 27, 2013

California Northern in HO

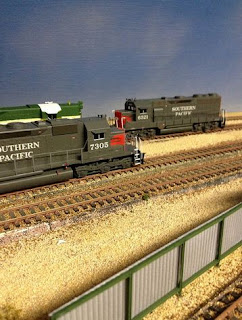
Below a few scenes that 'could have been' on the old SP trackage which was franchised to the California Northern starting 1993. It's 1994, at Napa Jct , and we see SD9 203 and GP15-1 107 on the service track at the loco maintenance facilities.  They're flanked by a variety of SP power that could still be seen in the area at the time.


The other shot could have been made in the same year, but also as recent as 2010, when the GP15-1's were still in regular service on the trackage of the CFNR. (They have since been replaced by Genset locomotives, and the GP15-1's have been leased out to many other short lines, and can be found in various different areas, including Texas). Here we see 107 approaching Cordelia tunnel on way to Napa Jct.


The GP15-1 is an Athearn Genesis model, that I've just received a few days ago. I'm hoping to get another one as they are iconic locomotives for the CFNR and have been for many years, and fit in the time frame that I'm modeling on my home layout.

I've now ordered a Loksound Select Direct for this locomotive, to replace the build in PCB and leave room for a speaker etc. I've seen how little space there is in this small engine, and I fear that using a plug in decoder on top of the existing PCB will not leave enough space for much, and not enough 'air' for the speaker to operate reasonably well, as far as that can be expected from such a small unit.


Monday, October 21, 2013

Weathering to improve realism

As you might know, weathering is the act of treating a model to make it look it has been exposed to the elements, both natural and man made.
There are some fantastic examples out there, but it is also something that puts people off, being afraid to over do  it and ruin a model.

However it doesn't need to be like that, and a few simple treatments can make the appearance of a model less 'toy' like, and isn't complicated or 'scary'.

See the below Before and After pictures.
All that was done to this hopper is apply a light weathering as follows:
- Using tempera pigment powders (any weathering powder or chalks will work just as well or perhaps better, it's just what I had on hand) and apply these with a soft brush and Qtips to the model. I only used three colours: Black, Burnt Umber and Raw Siena.
-Painting of the wheels in a rust brown colour (Humbrol RC402 in this case)
Dry brushing the trucks with the same paint (dry brushing is done as follows: dip the brush in the paint, wipe this brush off on a piece of paper until it almost doesn't let off any paint, and 'brush' the trucks. It is enough to accent some details ).

After I was happy with the results of the powders I sprayed a light coat of Testor's Dullcote over the model to fix the powders in place. (spray from about 8" away so you don't blow the powders off the model again).
Total time spend on this model, less than 15 minutes.
I could do a lot more, and I will in the future, but my initial plans are to treat every car on a basic level like just described, to make them look a bit less 'plastic', and more real, and then come back to them to add more intricate weathering etc.

Give it a try.

BEFORE

AFTER


Wednesday, October 16, 2013

Improving Peco Insulfrog reliability

You might have found similar tips around the web, but I thought I'd share this anyway.

Peco Insulfrog turnouts are a great product, and their US style code 83 track is fairly easily obtainable.
As with their (british) code 75 products, they come both as insulfrogs , and electrofrogs.
Electrofrogs can be used if you want to electrically connect the frog of the turnout, but it's not always needed, particularly with the bigger locos many US railroaders use (exceptions being track-mobiles etc).
Insulfrogs can still be improved upon. They normally rely on the moving blades to touch the stock rail , in order to supply power, but paint, ballast and other dirt can make this less reliable over time, and then your loco stalls.
The solution is simple however, and that is to solder small wire bridges to the BOTTOM of the turnout, prior to installing them on your layout.
I won't go into explaining how it works here, but rather show you a picture on how they are fitted.
It's easy to do, asuming you have a soldering iron and have some basic skills:
Step 1: get a small thin wire, strip it and tin it using some solder.
Step 2: add a tiny drop of flux to the bottom of the two rails between which the wire is placed.
Step 3: Tin the tip of your soldering iron
Step 4: place the wire in the right spot and touch both areas briefly until the solder melts (this goes pretty quick).
Step 5: cut of the excess, and optionally paint the wire to make it less visible.

That's it. The result looks like this (seen from the bottom , where you would solder it) . The arrow indicates the jumper.


Tree Point, Wisconsin

Just to let you know, I've decided on a name for my new module. Tree Point, Wisconsin.

Wisconsin, because I wanted to model something in the mid west to have a 'home' for some of my other models. Tree Point is a name that I found sounded good, and sounds like 3 point, the number of switches on my module.

Track was ordered from RD Hobby in Germany, and is shipped so I should receive it soon (ish). This will make a nice winter project, and I hope to have something to show soon.


Tuesday, October 15, 2013

New track plan for a new module

After some deliberation, and playing with track planning software, I've settled for the following track plan.

It is very simple (and therefore prototypical), but should provide me with some switching fun.
Purely coincidental, the track plan does look a little bit like the Palmetto Spur plan, by Lance Mindheim, but still has enough changes not to be a blatant copy. It measures 18" by 3ft in length.

I haven't fully decided on the industries and their respective locations yet, the only thing that is certain is that there will be a corn syrup facility.


Just in case you're interested, below is the first track plan, which looks 'interesting' but has several short comings, and therefore I decided against it.


Thursday, October 10, 2013

And we're off

Strike the iron while it's hot is what they say, so I went and bought 3 pieces of flex track, managed to get hold of a pack of extruded foam board (it's getting harder and harder to find nowadays, not good news I feel), and cut two of them to size of 3ft x 18" , in total giving me 6 feet to play with.
I had initially thought of trying to go for half that, but looking at it, that would just be too small for what I want to do.
I'm trying to make a trackplan for a switching layout, that I can use as a stand alone, but also eventually use at meets and join up with other modules.
While I've been trying to sketch all sorts of configurations, I find that using the actual boards, and move about with track and templates a bit , gives me a much better feel for the size and available space, and works better for my imagination :-)

So here's first evidence that things are moving on.


Corn Syrup industries

The tank cars I reported on last post, are actually dedicated cars for the transport of high fructose corn syrup. This syrup is used in virtually all soft drinks. I found that the contents of one of these cars, is sufficient for 1.000.000 cans of Coca Cola or similar.
I've been doing some research and received a great deal of help from various persons on a variety of railroading forums, I've received articles, links and a lot more. It turns out that these cars and specifically their unloading facilities take up little space, but depending on the grade of syrup, might have different unloading spots along such facilities, but can be on the same track.
Therefore it's an industry that is easily added to a model railroad as it does everything you need for the limited space you have. It takes little space, and lot's of operational potential. Also the facilities are fairly basic in appearance, so not complicated to build either.
So you've guessed it, my 'to build' module will have such an industry on it.

To give you an idea on what these look like, here's an areal picture of one, this particular installation has 3 tracks, one for the unloading, and two to spot full and empty cars , but there are loads of similar examples that have just one track.

The other is a similar, but simpler facility, with two tracks.


Tuesday, October 8, 2013

My newest purchases

There, I couldn't help it, but I happened to pass a hobbyshop today, and had a look inside, and resistance was futile, I walked out with two tank cars, and a structure kit...

I now have got myself another 'problem'. My Wolter Springs module is now in the UK, and I've got nothing to operate these on, as I found these in a shop in the Netherlands...  (Harlaar modelbouw in Badhoevedorp, about 10K away from Amsterdam Schiphol airport by the way). 
So I am now trawling the internet for inspiration, to build myself a small, portable switching layout, just to have a bit of fun with while I'm over here. Once I've got a track plan I'll let you know, and I will post here from time to time how I get on with it.


Monday, September 30, 2013

A quick video

I shot this short video on Saturday, mainly as a motivation to myself to start working on my home layout in the coming period.
Hope it works the way I intend :-)


Thursday, September 26, 2013

Overdue update

Wow I can't believe it is nearly October and I haven't posted in a while. The summer is now over, and the weather has been great for most of it, and even though it's officially Autumn, it still is very mild in general here in the UK. That has largely meant that my layout in the loft room was uncomfortably warm to work on, and the weather enticed us to be outside more and do other things with the family, and going on vacation. I guess it's a pattern that most model railroaders recognise.
I haven't been entirely idle though, the last couple of weeks I managed to make progress on my module boards, to the extend that base scenery is done, and it has been used in a first modular railroad gathering of my local group.
I've located a few problems on it, that I need to improve, mostly allignment issues ( I need to drill out the legs a bit deeper so that the adjustable bolts have a greater range) , and there was a strange electrical problem with it too, about half way into the operating session, so I need to figure out what happened there.

Anyway, here's a picture of it in action:
http://www.flickr.com/photos/12783415@N06/9859845944/

and here:

http://www.flickr.com/photos/12783415@N06/9859864736/

Koos

Monday, July 1, 2013

Card stock modeling

Recently I've taken an interest in card stock modeling.
I've seen many pictures on the interweb, that shows some nice looking structures made of card stock or some kind of hybrid.
So I decided to give it a go.
I've purchased/downloaded a couple of structures from the 'Clever Models' website, (they have a couple of freebies too) as well as a small building from the 'model train software' website. see: http://www.modeltrainsoftware.com .
The last example is actually software that along with some examples, basically supplies you with a design package and lots of texture templates, to design and create you're own buildings. The Clever models site has a series of pre-designed structures ready for down load, as well as several textures (brick walls, windows etc) to make your own. See http://www.clevermodels.net/ .

I've also bought a couple of grades of paper to print these on, to experiment with what works best. So far I've got some sheets of 120gr/m2 , 160gr/m2 and 300 gr/m2 from an arts and craft supplier, to try things out with, and I decided to build a first structure using the 160 gr/m2 grade paper.

Here's my 'freebie' structure from the model-train-software site under construction. So far so good. I know some of my regular visitors build in card stock too, so I'd be curious if you have any good sites for me to find good structure models , obviously north american prototypes, and if they are Californian prototypes, even better. :-)


Tuesday, June 11, 2013

Bachrus rolling saddles

 .Today I took delivery of my Bachrus Rolling Saddles.

These locomotive rolling stands, enable you to work on your locomotive , while not requiring a whole layout. You can run in a locomotive when new, use it to set up DCC decoders etc.
I bought mine from www.sprog-dcc.co.uk.  A basic set of 4 stands , enough for a loco with 4 driven axles will set you back just under 50 GBP. While not cheap, they are very well made and can be used for other gauges too (the type I have can be used for HO to S scale).
For 6 axle locos you can order an additional set of 2 stands (which I've done ), and there are also stands for steam engine tenders with non driven axles etc.
It will get a bit pricey when you need to run in articulated locomotives such as a Big boy, but this tool is very useful, and I'd recommend it to anyone with a larger locomotive fleet, or does regular maintenance or modification work to their locomotives.
Here it is in action using my Atlas GP38-2. It enabled me to properly tune in the ESU decoder inside this locomotive. One thing I've found already is that particularly at higher speeds, the volume of the current speaker isn't high enough , the mechanism is louder. Something I would not have found until it was run on a bigger layout....

Thursday, June 6, 2013

grass lands

Here another progress shot of the grass area I'm working on.
This is purely to demonstrate how a few different shades and textures mixed create a more realistic appearance.
More has since been added, but as it is still wet of glue, I'll wait with taking a picture of it.


Tuesday, June 4, 2013

Sound at Wolter Springs

Here's a quick video, of the first run of my Atlas GP38-2 on my Wolter Springs module, after it was equipped with an ESU Loksound Select decoder. It was originally intended for an SW1500, but I couldn't quite get it to fit properly so I used it for this loco instead. Therefore the engine you hear is an 8 cylinder 645E non turbo charged, not quite enough cylinders for a GP38-2, but I will load up a different sound set in the future. For now this will do.
Also visible is some of the new grass scenery I'm currently applying.


Thursday, May 30, 2013

Pastures green

The next step in scenery construction on my module, is to add some grass areas. I've started by adding various sizes of grass tufts, by Heki, the colour is Savannah (no 1574) wild grass.
These are small mats that you can tear or cut in various shapes and sizes.
I will be mixing these with other colours, sizes and textures to create a realistic wild (non manicured) grass area along the right of way.  They've only just been put down, and the white glue I am using is still visible in places.


Wednesday, May 29, 2013

Tuesday, May 28, 2013

An update

Last week I shared some videos of the Conrad turnout motors.
Since then, I've been able to finalise all the wiring of my 'Wolter Springs' module boards.
It is very well possible that I will need more wiring in the future for things like lights of various types etc (think street lights, buildings ) or animations such as grade crossings etc.
The basics are done however, all trackwiring , turnout control, DCC bus (plus an auxilary bus), Throttle bus, as well as 16VAC bus wiring is in place.
I've also painted the fascia of the boards , which improves their appearance and protects the wood.

This means I can now continue with another aspect which is scenery.

The other thing I've ordered and received is an ESU loksound select decoder, pre-loaded with an 8cylinder EMD 645 non turbo engine. This decoder is going to be used in my SW1500 on the main layout. I have reported that I've struggled to get decent low speed performance out of that engine, and ESU reportedly has some of the best motor control electronics in the business, so hopefully that will cure the problem. (I've already done all the mechanical checks etc), and at the same time it will get sound, and LED lights.

Another project I will soon continue with is the Southern Pacific GP9 commuter engine. I've got most detail parts in stock now, and the Proto 2000 shell I have for this has been stripped.
First on this project is to modify the side sill so that the tank filler cap is moved backwards instead of its current forward position.

So as you can see, plenty to do, and not enough time to do it all in, but we'll get there slowly.

Stay tuned.


Monday, May 20, 2013

An under-floor turnout motor in action

Hi all,

I've recently installed a couple of turnout motors, made and supplied by Conrad electronics.
The link to this motor is here: http://www.conrad-uk.com/ce/en/product/ ... -Mechanism
It costs only £3,99 , and has a micro switch to use for switching of the frog polarity or other uses. It might not be a Tortoise, or a Fulgurex motor, but it might prove sufficient for your use/budget, small project or other uses. I've decided to use them on my NMRA-BR spec module, and see how they withstand the test of time.
Here are two Youtube videos I made, one from above, and one from below, seeing it in action. It is not a 'slow motion' motor, but it's a bit more gentle than a Peco motor or similar design. The videos were uploaded directly to Youtube using the free app 'Youtube Capture' for iPhone.

Part one, from above.


Part two, from below.

Thursday, April 11, 2013

Athearn Genesis GP38-2 Southern Pacific

Finally, after a long time, I've got something to share with you again.
I've received my two Athearn Genesis GP38-2 locomotives, Southern Pacific of course. It was a long wait, but worth it. These locos look the part.
They don't yet sound the part, as I have ordered the non sound DCC ready versions, so I can put my decoder of choice inside, rather than getting a limited version of a Tsunami decoder, which they would come with from factory. In the process, I can also spread the cost, and take my time.

I'm very happy with the level of detail, but of course, being SP locomotives, just like my other SP power, they're crying out for some weathering. I really should try and make a start with that soon. SP and clean is a contradiction in terms :-)

Here's a picture.

Monday, March 4, 2013

Athearn CFNR GP15-1

It looks like 2013 is going to be a tough year on my bank account, and a great year for my model railroad.
I am expecting delivery of my Athearn Genesis GP38-2 in the next 6 weeks or so, which will expand my SP roster nicely. However I also pre-ordered an Athearn Genesis GP15-1 in CFNR paint, but as always with pre-orders, it is not always certain that the model is actually going to be produced. Well in this case I need not worry, Athearn recently showed of a painted pre-production sample of this loco at the San Mateo show and it is looking great. Additionally the Athearn website is updated to show a picture of the model on their pages.

Seeing this engine, I'm almost tempted to order a second one, but I really can't stretch to that budget wise...


Sunday, February 17, 2013

Small details

I recently was recommended to take a look at 'Unit Models'. This small family business makes great details and items that are ideal to further detail structures or add items on other areas of your layout.
There's small US style mailboxes, roof vents, oil drums, small sheds , relay cabinets etc etc.

Their range certainly contained some items that I really liked, so I placed an order for some of these, and will use them (among others) for my warehouse.
Take a look at http://www.unitmodels.com/  . I've now added them to my ever growing list of useful links.


Thursday, February 14, 2013

Creating a believable railroad

There are many factors that help in creating a realistic model railroad.  All too often, we focus on painstaking detail, weathering , scenery etc etc. However, another crucial element is to have a good look and do some research when you're buying your locomotives and rolling stock. If your goal is to have great realism, and you're modeling a branch line, then a Big Boy, or a consist of SD70Ace locomotives isn't going to look right.  Similarly, you have to avoid a collection of 'exceptions'.
With that I mean, that while a certain type of loco , or guest railroad (lease power) showed up at some point, having that on the layout might not come across as realistic. Instead go for the ones that would be there most of the time, perhaps this was in the shape of GP38-2 locos, and of a certain road.

The same goes for your freight car fleet, make sure you have sufficient of the 'home railroad' , that you would commonly see to make a convincing scene. There are many boxcars I'd like to have, but I have resisted buying them because they would not have been around or seldom in the area and era I model. I came across a set of 5 Cotton Belt box cars recently, all with different roadnumbers.
Now those I can use, as my layout is SP/CFNR, and Cotton Belt box cars were quite common place in California. I need to do a lot of weathering and some graffiti attacks to these, but they do convey the fact that my layout is SP territory predominantly. 
Here they are shortly after arrival in the mail, on my module. They will find good service on my home layout in time.


progress on the warehouse

It's been a little while since I've been able to continue on this project, but here's the next stage (the warehouse is not placed in the right spot here btw)

I've applied a 'concrete' foundation by finding a suitable concrete pattern on the internet, scaled it down into strips and printed it out on a colour laser printer at work, and glued these to the structure base using PVA glue. Next I used a black craft paint (same stuff they use at pre-school etc) to paint the roof, and sprinkled on Woodlandscenics B76 cinders ballast while it was still wet. It will be followed by a layer of diluted PVA glue to further fix it in place. After that it is time for detailing the roof etc, but I first need the detail parts (such as AC units, vents etc) which I haven't even ordered yet....

Tuesday, January 29, 2013

SP Cement train Picture of the month

Below is a SP cement train, somewhere in the early '80s,  running on the SP coastline headed for San Luis Obispo, CA.
 Motive power is GP9 3428, hauling 5 PS-2 cement hoppers, and a caboose.

And yes, it's a model.
The loco is a detailed, repainted and weathered Lifelike Proto2000 GP9, and the hoppers are from a variety of sources (Kadee, Atlas etc), all detailed / decalled and weathered, by Brian Moore.


Photo by Brian Moore

Monday, January 28, 2013

Athearn announces new GP50

Athearn has just announced their new GP50 in their Genesis line of locomotives.

The models are based on the earlier release of the GP38-2, sharing the same modular construction and mechanics. Athearn has developed a new set of molds to enable them to produce a variety of 'Geeps' over the coming years, rather than having to develop molds for each locomotive variation. It can be as easy as just attaching a different short hood, different door set, roof ventilator etc etc.

Below a video of their introduction. They will ship later this year.


Sunday, January 27, 2013

Operating sessions at the local club

Recently, I was present and operating at our local club, using modular boards build to the NMRA-BR specification. For more about our standard , visit the NMRA-BR website at: www.nmrabr.org.uk , or better still, become a member, only 23 pounds per year , including our own full colour bi monthly magazine Roundhouse.

This video was filmed by Mike Ruby, with the intention to show how long a switching session can last, if you operate proto-typically .  It is an aspect of the hobby that is getting more and more interest in the UK and elsewhere, and is much more fun than just watching trains run around in circles. It gives them a purpose.
Hope you enjoy it.

Tuesday, January 22, 2013

SP power at Napa Jct

SP Power on the service track at Napa Jct CFNR service facilities.

It's 1994:

The California Northern is about 1 year old, and running over former SP trackage. The SP is still present however, and takes over trains that the CFNR brings down to Napa Jct. and elsewhere. Here a string of mixed SP power waits for their next assignments. Meanwhile CFNR SD9 203, one of 4 SD9's they own, is just about to depart with a short mixed freight West to Suisun, and will continue it's run north towards Willits, to be part of a lash up of 4 SD9's for the downhill run of a long string of flat cars loaded with wood, the so called Willits turn.
This run with many grades needs to be operated with locos equipped with Dynamic brakes, and the SD9's are the only locomotives so equipped owned by the CFNR. The fleet of GP15-1 are normally used for the flatter runs.


Wednesday, January 16, 2013

Interior details

I wanted to add some interest to the warehouse I'm building so I decided to model the building with one of it's 3 freight doors open. I then needed some interior details, but wanted to make sure that it appears that the building is quite large and has lots of storage, after all, it is a warehouse.

I decided to surf the web to find a suitable picture, that I scaled down and printed out. I glued the picture on a piece of scrap styrene and glued this a short distance behind the door opening.
To further create the illusion of depth, I will add some 3D details in front of the picture, and of course the door frames etc still need to be added too.
The overall effect is already quite good, so it gives me hope that the end result will look convincing.


Tuesday, January 15, 2013

Scratch building a warehouse

I needed a rail served industry for my module 'Wolter Springs', so I had a look around commercial kits that I could possibly use.
I found however that none would really fit the bill, and would need significant kit bashing to fit in the space I had planned for it.
It is at an angle and therefore the building, when viewed from the top would need to be largely triangular. I therefore decided to scratch build my own warehouse. It is entirely 'made up', I don't have a specific prototype for it, but I will make sure it will look 'authentic' enough not to look unrealistic. Besides, I had several scrap bits of styrene laying about that I could use.

Here is an 'in progress' picture of it's current status. This evening I've spend extending the structure , added a door and steps , re-enforced the inside of the walls and added a ledge on which the roof can be put down, and put a loading floor inside behind the doors. This will enable me to add a small amount of interior details that might be visible where the doors will be modeled open, but not the complete depth of the building.

Monday, January 14, 2013

SP at Napa Jct

I have put a bit more time into my home layout, and have finished the fence near the scrapyard, apart from weathering. See picture.
Also, I have moved my GP35 locomotive to the layout, I've swapped the decoder to a TCS T4X for the time being, and used the Lenz Gold that was present in it for my CP rail GP38-2. 
In future I will go for a sound decoder in this locomotive.  
Below is the GP35, at Napa Jct, on the spur to the loco service facility.


Sunday, January 6, 2013

Wolter Springs update

Well here we are, my module Wolter Springs is slowly progressing.
I've just finished 'gluing' together the Faller grain silo kit I described before. I'm not done with it though.
first off, the structure just screams 'Plastic!!!' at me. It is therefore in need of paint and weathering to loose that plastic shine. Also some of the detail parts are quite coarse, so painting them darker will make that less obvious. The worst part is however that the loading tube, that runs from the top of the conveyor tower to above where a hopper would get parked, does not fit properly, and therefore was unable to be attached. Something went wrong in the dimensions at the factory. Also, some other parts didn't quite fit, or had warped a little bit. nevertheless, I think I can rescue this structure, and scratch build a couple of parts to make it look much better and hide the defects.

Next to it in this picture are my newly acquired F9 A+B, which also need some work. However they seem to run quite smooth in DC mode, so I'll now go ahead and identify the parts needed to super detail these, as well as a suitable (sound) decoder. This being a wide body diesel, I should be able to get a bigger size speaker in it (particularly in the dummy B unit), so it should sound quite good.


Wednesday, January 2, 2013

New Years resolutions

Happy New Year everyone!

It's this time of year that people set new plans/goals for the coming year. Some choose to go on a diet, others try to quit smoking etc etc.
I'm looking back at 2012 and noticed that I haven't posted as much as in year prior. While there have been personal issues in my life that have taken up leisure time, I could possibly have been a  bit more active.
I have to say that I have also posted on some other forums around the interweb, sometimes as part of a discussion, sometimes to report something new/relevant.
Of course this blog suffered a little, and therefore I've made the following resolution, and that is to post more frequently on this blog (obviously not for posting sake, but with some model railroad news, my progress on my two layouts (the CFNR / SP layout in the roof/loft of my house, and my Wolter Springs module), and other related topics.

I hope you will visit me regularly, and by all means post a comment / question or so, not only will that keep me on my toes and encourage me, it will also provide me with feedback for the blog.

By the way, I'm progressing slowly with my scenery, as below picture shows.
Thanks for visiting.